Are you looking to elevate your Christmas tree's decoration this holiday season? Look no further than the transformative power of ribbon! This article will provide a comprehensive guide on how to put ribbon on a Christmas tree, offering a variety of simple yet effective methods. We'll delve into a plethora of creative ideas and explore unique decorating techniques to inspire your festive vision.
Decorating your Christmas tree with ribbon is more than just an embellishment; it's an art form that creates harmony, elegance, and reflects your personal style. Recognizing this, we'll unveil numerous approaches to skillfully incorporate ribbon, allowing for flexible adaptation to each unique tree.
Furthermore, this guide will furnish you with invaluable tips to save you time and effort while maximizing aesthetic impact. Let's embark on this journey to adorn your Christmas tree and create an unforgettable holiday centerpiece!
This article will guide you through various techniques and provide inspiring ideas on how to put ribbon on a Christmas tree effectively. We'll explore different ways to achieve a stunning look and offer helpful tips for a beautifully decorated Christmas tree.
More...
How to Put Ribbon on Christmas tree?
So, how do you put ribbon on a Christmas tree? Well, you will find many different ways and tips on how to put ribbon on Christmas tree, and most of the times, it depends on the look you wish to achieve. This process makes use of an assortment of wired Xmas ribbon and offers a less structured, more natural look for your tree. Apart from that, it also offers the illusion, which you utilized more ribbon that you actually did.
Items Needed:
To bring your beautifully ribboned Christmas tree to life, you'll need a few essential items. First and foremost, you'll need ribbon. When choosing your ribbon, consider materials like wired ribbon, burlap, mesh, or velvet, depending on your desired style. Different textures and widths will add visual interest. Of course, you'll also need a Christmas tree itself, whether it's a fresh-cut fir or a convenient artificial one. Have a pair of scissors handy for cutting the ribbon to your desired lengths.
Finally, gather your favorite ornaments to add the finishing touches after the ribbon is in place. With these supplies assembled, you're ready to begin transforming your tree into a festive masterpiece.
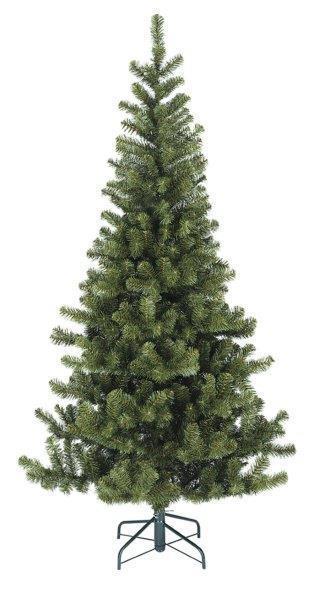
Step 1: Begin with an empty tree
Before you start adorning your tree with beautiful ribbons, it's crucial to begin with a blank canvas. This means your tree should be completely bare, with the exception of the lights. It's always best to put the ribbon on the tree before the ornaments.
This allows you to work the ribbon deep into the branches without obstruction and create a more integrated, layered look. Trying to add ribbon after ornaments can be a frustrating experience, forcing you to maneuver around delicate decorations and potentially knocking them off.
Always remember: ribbon first, then ornaments. If your tree isn't pre-lit, string your lights around the tree, ensuring they are evenly distributed. Once your tree is illuminated and free of ornaments, you're ready to move on to the next step!
Step 2: Cut the ribbon
Now that your tree is prepped and ready, it's time to prepare your ribbon. You can use a single type of ribbon or mix and match several coordinating ribbons in different textures and widths for a more dynamic look. If you're using multiple ribbons, consider varying widths to add visual interest. Cutting the ribbon into 4-feet pieces is a good starting point, but you can adjust the length based on your tree's size and your desired look.
For a fuller, more voluminous effect, you might opt for longer pieces. Having all your ribbon pre-cut into manageable strips will streamline the decorating process. So, grab your scissors and start cutting!
Step 3: Make ribbon bundles
After you’ve cut a 4-foot strip from your 3 coordinating ribbon rolls, place two of the strips on top of each other and pinch them in the middle. Then, connect the third strip to the other two to make a small bundle.
Step 4: Add the ribbon bundles to the Christmas tree
With your ribbon bundles prepared, it's time to start adding them to your tree! There are several ways to attach the ribbon. You can use the wire branches of an artificial tree, floral wire, or even small, clear zip ties to secure them. For a simple method, you can tie the ribbon directly onto the branches. Begin at the top of your tree and work your way down, strategically placing the bundles throughout the branches.
To attach each bundle, nestle it deep within the branches, then secure it using your chosen method. If using the tree's branches, wrap a branch around the middle of the bundle to hold it in place. If using floral wire or zip ties, ensure they are discreetly hidden within the foliage. Spread the individual ribbons of each bundle outwards, fanning them to create fullness and visual interest.
Ensure the ribbons are evenly distributed around the tree. Step back frequently to assess your progress and make any necessary adjustments. Don't be afraid to experiment with placement to achieve a balanced and aesthetically pleasing look. You're aiming for a natural, flowing effect, as if the ribbons are organically woven into the tree.
Step 5: Repeat the process
Now that you've started adding your ribbon bundles, simply continue repeating the process until you've achieved your desired look. Work your way around and down the tree, filling in gaps and creating a sense of fullness. As you add more bundles, consider experimenting with different placements. Try draping some ribbons vertically, allowing them to cascade down the tree. You can also weave ribbons diagonally, creating a dynamic criss-cross pattern. If you want a more structured look, wrap the ribbon around the tree, ensuring even spacing between each layer.
Don't be afraid to get creative! The beauty of this method is its flexibility. You can adjust the density of the ribbons, the direction, and the overall flow to match your personal style. Remember to periodically step back and assess your progress. This will help you maintain a balanced look and make any necessary adjustments along the way. Keep adding bundles until you're satisfied with the coverage and the overall aesthetic of your ribbon-adorned tree.
Step 6: Add the ornaments
With your beautiful ribbon work complete, it's finally time to add the ornaments! While it's generally easier to add ribbon before ornaments, you can still add it afterward if needed. However, be prepared to carefully maneuver around the ornaments and use longer, thinner strips of ribbon to tuck into the branches.
Now, hang your ornaments, distributing them evenly throughout the tree. Place larger ornaments towards the bottom and smaller ones towards the top to create a balanced look. As you hang your ornaments, consider their relationship with the ribbon. You can nestle some ornaments within the folds of the ribbon, while letting others hang freely.
This interplay between ornaments and ribbon will add depth and visual interest to your tree. Step back periodically to admire your work and make any adjustments as needed. Once you're happy with the placement of your ornaments, your beautifully decorated Christmas tree is complete!

Different Ways to Use Ribbon on a Christmas Tree
Aside from thinking about putting some Christmas projector, you might want a beautiful Christmas tree as well. Adding a Realtree ribbon to a Christmas tree is one of the most complicated parts of decorating a Christmas tree with ribbon; however, it does not need to be.
Barber Pole Method
Perhaps this is the most typical way of tree ribbon decoration. In order to use the barber pole method, you can begin at the topmost of your Christmas tree and tie one end of the ribbon to your tree with the use of chenille sticks or floral wire.
Criss Cross Method
On the other hand, the crisscross method is a more advanced method of adding ribbon to a Christmas tree. This type of method will utilize twice the number of ribbons as the first method.
In case you didn’t know yet, this method is specifically alike with the first method, except that you will run a barber pole going to the left of the tree and the other to the right part of the tree. Nevertheless, the challenging part of this method is trying to get the right and left parts to be symmetrical as well as cross at a similar point on the Christmas tree.
Swag Method
The third method is the swag method. This is the most sought-after method for applying Christmas ribbon when cranberry and popcorn ribbon was mainly utilized; however, it’s still an alternative to ribbon garland.
To achieve this method, perform the same process as the barbell pole tuck method; however, the only difference is you swag the ribbon in a loop pattern. You might prefer to cut the ribbon into pieces so you can go straight across the tree and complete the circle on the other part rather than keeping your ribbon in one piece.
Random Method
A lot of people wish for a more casual, organic, and free-flowing Christmas tree décor. Those people might want to utilize the random method of placing ribbon and tree bows on their tree.
For you to add ribbon to your tree with the random method, place the end of your ribbon at the topmost part of the tree and tuck in a section at a random area on the Christmas tree. Just continue tucking right up, left, down, and diagonally on the tree in the same parts. Ensure to step back infrequently to look at the development and do any changes.
Glitter Rope Tape
A ribbon, which has recently become famous for decorating garland with ribbon is known as glitter rope tape. Did you know that this isn’t a sticky tape; however, it is a coiled glitter garland? This can be applied to a tree in several ways, but it’s rigid and likes to stay in a curled form.
You will find some designers who want to have it applied casually, curling right, left, down, up, and diagonally. It doesn’t like to be bent or straightened.
Draping Ribbon
Achieve an elegant, flowing look by draping ribbon loosely over the branches. Start from the top and let the ribbon cascade down, creating soft curves and movement. You can use a single long piece or multiple shorter strands for a layered effect.
Looping Ribbon
Create visual interest and dimension by looping the ribbon. Form loops of varying sizes and tuck them between branches, securing them with the branch itself or floral wire if needed. This technique adds fullness and texture to the tree.
Placing Ribbon Strategically
Instead of wrapping or looping, strategically place shorter, pre-cut pieces of ribbon throughout the tree. This allows you to highlight specific areas, create focal points, or fill in gaps. Experiment with different angles and placements for a unique look.
Running Ribbon Down the Tree
For a more structured approach, run vertical lines of ribbon from the top to the bottom of the tree. You can use single strands or multiple ribbons side-by-side for a bolder statement. This technique works well for creating a sense of height and symmetry.
Styling Ribbon
Get creative with how you style the ribbon itself. Curl the ends, create bows, or twist the ribbon to add personality and flair. Wired ribbon is particularly well-suited for shaping and styling.
Tucking Ribbon
For a subtle yet sophisticated touch, tuck small pieces of ribbon deep into the branches. This technique adds depth and a sense of mystery, as the ribbon peeks out from within the foliage.
Weaving Ribbon
Intertwine ribbon through the branches in a weaving pattern, creating an intricate and textured look. This method requires more patience but results in a truly unique and captivating Christmas tree.
Layering Ribbon
Use multiple ribbons of different colors, textures, and widths to create a layered effect. This adds visual complexity and richness to the overall design. Experiment with different combinations to find a look that suits your style.
By exploring these diverse techniques, you can move beyond conventional ribbon placement and create a truly personalized and stunning Christmas tree. Don't be afraid to mix and match methods to achieve your desired aesthetic.
Essential Tips for Beautiful Christmas Tree Ribbon
We always try to decorate our Christmas tree in the most creative way possible; however, we end up beautifying it with the same old garland and ornaments. But, worry not as we will provide you with amazing decoration tips and ideas for your Christmas tree below.
Choosing the Right Ribbon
You can utilize either a wide Christmas ribbon wired or unwired one; however, you need to ensure that you pick a type, which holds some shape and form. An unwired craft ribbon works for twisting loosely around your tree; while the wired ribbons hold its shape better and work very well for long curling streamers.
Further, a rolled ribbon having an 8 inches' diameter across the roll is enough for a standard Christmas tree. So, ensure that your unrolled ribbon is between two and three inches wide.
Color Choices:
- Classic Red: A timeless choice, red ribbon evokes traditional Christmas warmth and pairs well with gold, green, and white ornaments. Consider a christmas tree with red ribbon for a classic look.
- Elegant Blue: Blue ribbon offers a sophisticated and cool-toned aesthetic, especially when paired with silver or white decorations. A blue wired ribbon for christmas tree can add a touch of icy elegance. Explore the meaning behind using a blue ribbon around a tree for a deeper symbolic touch to your decor.
- Harmonious Combinations: Don't be afraid to mix and match colors! Consider the overall color scheme of your ornaments and tree decorations. Complementary colors (e.g., red and green) or analogous colors (e.g., blue and green) can create visually appealing combinations. Explore Christmas tree with ribbon Ideas for inspiration on color pairings.
- Striped Ribbons: As you mentioned, striped ribbons are looking undoubtedly lovely, decked on a flocked tree. This neutral colored ribbon is going very well with the decoration of white and red. You can also add with it a minimal decoration of red cranberries, pinecones, and ornaments that will surely look stunning.
- Beige Ribbons: You also pointed out that a beige ribbon is utilized to beautify a small-sized Christmas tree. Aside from that, you can utilize tulle, flags, and crystal ropes.
- Silver and Black Ribbons: You brought up a great point about bringing the Christmas tree to a whole new level. If so, you can decorate it with a Black Platinum Pleated Ribbon. If we’re just talking about grand, decorate your tree with silver, crystal and gray baubles.
Material Matters
- Wired Ribbon: Wired ribbon is highly recommended for its versatility. The thin wires along the edges allow you to shape and mold the ribbon, making it ideal for creating bows, loops, and other decorative elements. You can utilize either a wide Christmas ribbon, wired or unwired one; however, you need to ensure that you pick a type that holds some shape and form. An unwired craft ribbon works for twisting loosely around your tree, while the wired ribbons hold their shape better and work very well for long curling streamers.
- Unwired Ribbon: Unwired ribbon offers a softer, more flowing look. It's suitable for draping and weaving but may not hold its shape as well as wired ribbon.
- Burlap Ribbon: Burlap ribbon adds a rustic, natural touch to your Christmas tree. It pairs well with wooden ornaments, pinecones, and other natural elements.
- Mesh Ribbon: Mesh ribbon is a popular choice for creating a full, voluminous look. Its open weave allows the tree's lights to shine through, creating a magical effect.
- Velvet Ribbons: As you highlighted, if you wish to provide a majestic and grand look to your tree, then, why not have it with a velvet ribbon in a contrasting or similar color? Or you can also utilize two different colored ribbons, any color goes best with your tree. You can also fill your Christmas tree with some ornaments as well as other shimmery objects and you are sorted.
Width and Texture
Wide Ribbon: Wide ribbon makes a bold statement and is excellent for creating large bows or for wrapping around the tree in a barber pole or crisscross style. Further, a rolled ribbon having an 8-inch diameter across the roll is enough for a standard Christmas tree. So, ensure that your unrolled ribbon is between two and three inches wide.
Narrow Ribbon: Narrower ribbons are more versatile for intricate designs, such as weaving, tucking, or creating smaller loops.
Texture Variety: Experiment with different ribbon textures to add visual interest. Consider combining smooth satin ribbons with textured burlap or glittery mesh for a dynamic look.
Making Your Own Ribbons
For a truly personalized touch, consider creating your own ribbon decorations. (how to make ribbon decorations for a Christmas tree, how to make ribbons for a Christmas tree). This allows you to choose the exact colors, patterns, and materials that match your vision. You can find numerous tutorials online that demonstrate how to make various types of ribbon bows and embellishments.
Using Ribbon as Garland
Ribbon can be used not only for accent pieces but also as a primary garland. Learn different techniques to create unique and eye-catching garlands using various types of ribbons.
Ribbon on top of the tree
Consider using ribbon to decorate the top of your tree. In addition to wrapping your tree via a plaid ribbon, did you know that you could also try creating Christmas Tree ribbon toppers out of it? Doing this is very easy, as you only need to create a Christmas tree bows out of it and put it on the top of your Christmas tree. Make sure that you make your bow strong so it does not fall off.
Plaid Ribbons
You rightfully mentioned that if you want to achieve a countryside or rustic Christmas theme to your décor, then using plaid ribbons is an ideal option. You can design it with a pinecones, cap ornaments mitten and lights.
Blue Ribbons
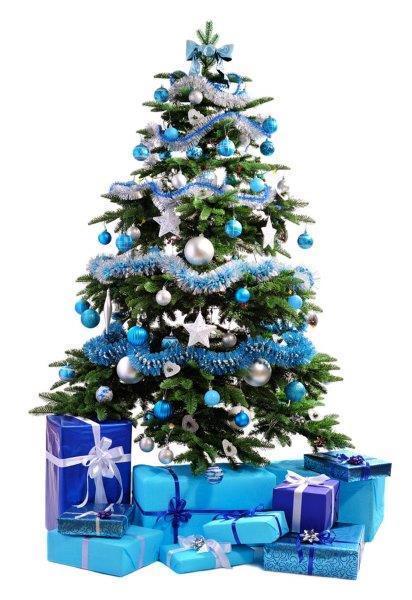
Provide a frosty and icy look to your tree by decorating your Christmas tree with blue ribbons. In order to make it look more attractive, you can simply organize the ribbon on a frozen tree. The effect will really be unmatched. Plus, do not forget to add some icy, cool silver and blue ornaments.
Red and Blue Ribbons
Probably, red and blue Christmas tree ribbon is one of the preferred Christmas tree ribbon decoration ideas. You’ll surely take your eyes off it because of the stunning red and blue color combination.
Burlap Ribbons
Are you looking for a last-minute Christmas tree ribbon decoration idea? Then, this is ideal for you. If you have a burlap ribbon in your home, you can add to your tree. Using it will offer a unique and gorgeous look to your tree. Apart from that, it can offer a woodland touch.
By carefully considering these factors - color, material, width, texture, and crafting possibilities - you can select the perfect ribbon to enhance your Christmas tree's beauty and create a festive atmosphere in your home. Don't be afraid to experiment and find the combination that best reflects your personal style! Remember to look for inspiration
How to Put Ribbon Garland on a Christmas Tree?
I am quite sure that you are indeed familiar with a ribbon garland, am I right? Well, it could serve as an excellent solution to concealing the bare spots in your beautiful Christmas tree. At the same time, it could also add a touch of texture and color.
Yes, there are no set of rules on how to place a ribbon garland, still you have to avoid positioning it incorrectly to also avoid your tree to look too busy. Good to know that I have some tips here on how you can properly put a ribbon garland on the Christmas tree.
First, what are the things you’ll need?
- Christmas tree
- Various sizes of ribbon garland
- Faux greenery or faux garland
- Green chenille stems or pipe cleaners
- Scissors
- Ornaments
- Ladder or chair
- Pliers
Take note that using ribbons with different shapes and sizes would add texture and interest to the tree.
And you have to follow these steps:
Step 1
For those that are using an artificial Christmas tree, you should assemble the tree based on the instructions of the manufacturer. You also have to fluff each branch to fill out any gaps.
Step 2
Once your tree isn’t pre-lit, string lights around the Christmas tree.
Step 3
Next is to cut some garland into several one-foot pieces. Or get any other faux greenery that you might want to utilize. These might serve as fillers in the tree and would help in filling any gaps.
Step 4
Now, insert garland and the greenery to cover those noticeable gaps. Bear in mind that each time after inserting a few pieces of garland or greenery, you have to step away from the tree to make sure you are filling it evenly and assess where the remaining gaps might be.
Step 5
Cut several six-inch pieces of the green chenille.
Step 6
You now have to wrap the end of the ribbon with the chenille stem, at least leaving some excess chenille open at the ends and it would serve to anchor to your tree.
Step 7
Just continue tying the chenille stems at approximately 1 ½ feet apart along the ribbon. And just feel free to cut the ribbon at every 6 feet or more to make wrapping it around your Christmas tree a bit easier and a lot more manageable.
Step 8
Beginning at the very top of the tree, you should tie the end of the ribbon to the back of the tree by twisting the extra chenille stem around the branch.
Step 9
Now, bring the ribbon around then tie the next chenille stem on the branch of the tree.
Step 10
Just keep going around and tie the third chenille stem into the side of the Christmas tree. Let the ribbon to hang a bit loosely in between each tie as opposed to being pulled taut.
As a tip, you might as well use the branches of the tree to secure the ribbon on the tree.
Step 11
Continue the wrapping process in a zigzag manner, and leaving even spaces in between layers.
You can also tie a second ribbon to the back of the tree in case you run out of ribbon.
And simply continue wrapping and tying the ribbon therefore leaving even spaces in between layers.
Step 12
Proceed all the way to the very bottom of the tree and make the loops of the ribbon a bit looser towards the bottom and following the triangular shape of the tree. To experience more interest, you might use different shapes or sizes of ribbons. And tie a chenille stem to the end.
Step 13
Wrap the second type of the ribbon around the tree in alternating rows loosely. But, you should also allow organic movement.
Step 14
You should also sort the ornaments from lightest to heaviest and smallest to largest.
Step 15
Begin at the top of the tree, start placing the small and light ornaments, followed by the medium and the largest or heaviest ones down the tree. You can add any interesting shaped ornaments last.
Step 16
In making a topper, simply tie a bow with the main ribbon and thread a piece of the green chenille to the back of this bow. And attach this bow to the very top of the tree.
Step 17
Now, tuck the excess ribbon from the bow into the Christmas tree sides, making sure that you do not alter the tree’s shape.
Step 18
Finally, stand back and adjust any ribbon or ornaments as you see fit, and enjoy the magical glow of the newly decorated Christmas tree.
For additional beauty of your Christmas, adding and properly attaching a ribbon on it properly is a wise decision to consider. And so, following the above given steps will make the process a lot easier and faster.
Removing and Storing Your Ribbon
Each year, every time you get rid of the ribbon from your Christmas tree, make sure that you do it slowly and gently so as not to rip the ribbon. Roll every kind of ribbon up tightly and neatly and tuck the toll of the ribbon in a bag or box.
Make sure to keep the lid on your box or store the bag secured to avoid dust from accumulating on the mesh ribbon Christmas tree. Doing this will keep your ribbon fresh and prepared for use next year.
Conclusion
There you have it, everything you need to know about how to put ribbon on Christmas tree and essential tips and ideas on what type of ribbons to use. As you can see, ribbon offers a versatile and elegant way to elevate your Christmas tree decor. From the classic charm of red ribbon to the sophisticated allure of blue, and the rustic appeal of burlap to the shimmering elegance of mesh, the possibilities are endless. We've explored a variety of techniques, from draping and looping to weaving and tucking, and discovered how to choose the right ribbon based on color, material, width, and texture. You will find many different ways in which you can beautify and decorate your Christmas tree with a wonderful ribbon; all you need is some creativity.
By applying the techniques and insights shared throughout this guide, you're now well-equipped to transform your Christmas tree into a stunning masterpiece that reflects your unique style and holiday spirit. Don't be afraid to experiment with different ribbon types, colors, and application methods. Mix and match, explore your creativity, and most importantly, have fun with the process! Tell us how you think about this post by commenting below! Hope to read your thoughts!
Happy Christmas season everyone!
References
https://kelleynan.com/how-to-decorate-a-christmas-tree-with-ribbon/
https://www.countryliving.com/home-design/decorating-ideas/g28703522/christmas-tree-ribbon-ideas/
https://sanctuaryhomedecor.com/a-simple-way-to-put-ribbon-on-a-christmas-tree/
https://inspiredbycharm.com/christmas-tree-ribbon-tips/
https://www.ellaclaireinspired.com/10-tips-for-beautiful-christmas-tree-ribbon/
People also ask
What's the best way to put ribbon on a Christmas tree?
Answer:
To beautifully decorate your Christmas tree with ribbon, there are several effective techniques you can use. Here’s a comprehensive guide to help you achieve a stunning look.
Techniques for Adding Ribbon to a Christmas Tree
1. Cascade Technique
- Cut the Ribbon: Start by cutting your ribbon into 2-3 foot sections.
- Tuck and Hang: Begin by tucking one end deep into the tree and letting it cascade down naturally, either vertically or diagonally.
- Create Loops: After letting it hang about 6 to 12 inches, tuck it back into the tree and bring it out again to form another loop. Continue this process until you reach the bottom of the tree, creating a flowing, waterfall effect.
2. Coiling Technique
- Prepare the Ribbon: Cut your ribbon into similar 2-3 foot sections.
- Create Coils: Wrap each piece around your hand to form a tight coil, then gently pull apart to create a curled effect.
- Placement: Position these coils throughout the tree, either vertically or horizontally, to add texture and fill in gaps.
3. Double Tuck Method
- Initial Tuck: Tuck one end of the ribbon into the tree and let it drape down.
- Form a Loop: Tuck the center of the ribbon into the branches, allowing it to puff back out, and then tuck the final end back into the branches. This method creates a nice visual flow along the tree.
4. Bow Technique
- Make Bows: Cut a longer piece of ribbon (4-6 feet) and create bows using either wired or unwired ribbon.
- Placement: Position these bows on branches, letting the tails hang down for added elegance. Wired ribbons can be shaped for more structured bows.
5. Spiral Wrap Method
Start at the Top: Anchor one end of your ribbon at the top of the tree.
Wrap Downwards: Work your way down in a spiral fashion, keeping the ribbon slightly loose for a natural look. Aim for even spacing between wraps (about 8-12 inches apart) as you go down.
General Tips
- Use wired ribbon: Wired ribbons are easier to shape and hold their form better than unwired ribbons.
- Fluff Before Decorating: Ensure your tree is fluffed and lights are tested or installed before adding ribbon.
- Adjust as Needed: Step back periodically to assess your work and make adjustments for spacing and fullness.
- Final Touches: Once all ribbon is in place, fluff sections to create volume and make it visually appealing.
By utilizing these techniques, you can create a beautifully decorated Christmas tree that showcases your style and enhances your holiday decor.
Do I put ribbon on the tree before or after the ornaments?
Answer:
When decorating a Christmas tree, the best practice is to put the ribbon on the tree before adding ornaments. This approach allows you to position the ribbon deep within the branches, which can enhance the overall look and ensure that it doesn't interfere with the placement of ornaments.
Recommended Order for Decorating a Christmas Tree:
1. Lights: Always start with lights to ensure they are evenly distributed.
2. Ribbon: Next, add your ribbon. This allows you to tuck it into the tree without worrying about breaking ornaments or disrupting their placement.
3. Large Ornaments: After the ribbon, place larger ornaments to create a balanced look.
Smaller Ornaments: Fill in with smaller ornaments to add depth and color.
4. Finishing Touches: Finally, add any special items like a tree topper or additional decorative elements.
This method not only helps in achieving a more professional appearance but also prevents damage to your ornaments during the decorating process.

